Enhance Your Welding Skills: Expert Tips on Grinding and Sanding Welds
Most welds look rough right after the job, leaving your project far from professional. You know that smoothing welds is key to clean, strong joints, but picking the right grinding and sanding methods can be tricky. This guide breaks down welding techniques and essential abrasive tools to get your weld finishing sharp and smooth every time. For more insights, check out this guide to welding abrasive techniques.

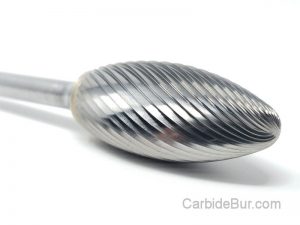
Have you tried our Carbide Burs for your job?
Mastering Welding Techniques
Getting a professional finish starts with understanding core welding methods. This section dives into the essentials you need to know.
Grinding vs. Sanding: Key Differences
Grinding and sanding might seem similar at first. They both smooth surfaces, but they do so in different ways. Grinding is more aggressive. It’s used to shape metal and remove excess material quickly. This is perfect for rough areas that need a lot of work. On the other hand, sanding is gentler. It refines the surface for a smooth feel, great for finishing touches.
When deciding which to use, consider your project’s needs. For large, uneven welds, start with grinding. If you’re just polishing the surface, sanding is your friend. Remember, the right tool can make all the difference in your final result.
Choosing the Right Abrasive Tools
The right tool can elevate your work. When selecting abrasive tools, think about the material you’re working with. For metals like steel, aluminum oxide abrasives work well. For softer metals, opt for silicon carbide. These choices impact how smooth your welds end up.
Consider the tool’s grit too. Coarse grits remove more material. Fine grits polish and refine. Always test on a small area before committing to ensure you’re using the best tool for the job.
Essential Welding Tips for Beginners
Starting with welding can be daunting. Here are some tips to ease you in:
-
Practice regularly: Skills improve with time.
-
Use protective gear: Safety should always come first.
-
Start small: Tackle simple projects before big ones.
-
Learn from mistakes: They’re great teachers.
By following these tips, you’ll gain confidence and improve your results.
Smoothing Welds Professionally
To achieve a smooth finish, understanding the importance of weld finishing is crucial.
Importance of Weld Finishing
Weld finishing isn’t just about looks. It also impacts strength and durability. A well-finished weld resists corrosion and stress, making it last longer. Smoothing welds is key to achieving a professional appearance and strong connections.
Grinder Tips for a Flawless Finish
Grinders are powerful tools. For a flawless finish, use a consistent speed. This avoids uneven surfaces. Move steadily across the weld, preventing dips and gouges. Choose the right wheel for your grinder; a flap disc can provide a smoother result than a standard grinding wheel.
Sanding Welds for Perfect Aesthetics
Sanding can perfect the aesthetics of your welds. Use a random orbital sander for even results. Keep your hand steady and let the tool do the work. With the right technique, your welds will look smooth and professional.
Advanced Metalworking Tools
As you refine your skills, introducing advanced tools can enhance your work.

Selecting the Best Carbide Burr
Carbide burrs are essential for detailed work. They come in various shapes for different needs. Choose a cylindrical burr for flat surfaces and an oval burr for curves. This Ultimate Guide to Weld Smoothing Precision offers valuable insights into choosing the right burr for your project.
Specialized Smoothing Tools Explained
Specialized tools can make a big difference. Consider rotary tools for intricate areas. They’re precise and can access hard-to-reach spots. For more insights, this PushCorp blog explores innovative grinding solutions.
Enhancing Weld Aesthetics with Precision
Precision tools allow you to elevate aesthetics. Use files for tiny imperfections. They help achieve a clean line. For a detailed guide, watch this YouTube short on precision smoothing techniques.
Preparation and Post-Weld Treatment
Preparation and post-treatment are vital for a seamless finish.
Steps for Proper Surface Preparation
Before welding, prepare the surface:
-
Clean thoroughly: Remove rust, grease, and dirt.
-
Use a wire brush: It helps in achieving a smooth surface.
-
Apply a primer: This aids in better weld adhesion.
Proper preparation sets the stage for a successful weld.
Post-Weld Cleaning Techniques
After welding, cleaning ensures durability:
-
Use a degreaser: It removes residues that can cause corrosion.
-
Polish with a soft cloth: This enhances shine and appearance.
Post-weld cleaning keeps your project looking fresh and lasting longer.
Ensuring Professional Welds Every Time
Consistency is key to professional results. Always follow the steps detailed above. Stay updated with techniques by joining communities like Metal Fabrication Tips. With practice, you’ll master welding, creating strong and beautiful joints every time.
By adopting these methods, you can transform your welding projects, ensuring they not only look good but also stand the test of time.
Looking for Carbide Bur Tools?
Check out our entire selection of USA made carbide bur die grinder tool bits
Follow us on Twitter

Return to CarbideBur.com
Carbide Burs – 1/4″ on 1/8″ Shanks – Accessories – Aluminum Cut – Bur Sets – End Mills – Long Shank – Solid Burs
Expert Tips on Grinding and Sanding Welds
Enhance Your Welding Skills: Expert Tips on Grinding and Sanding Welds Most welds look rough right after the job, leaving your project far from professional. You know that smoothing welds is key to clean, strong [...]
Surface Preparation With Carbide Burrs
DIY Rust Removal Made Easy: Surface Preparation With Carbide Burrs Rust stuck on your metal projects can ruin hours of work and leave surfaces uneven. You want a way to clean it off without wasting [...]
Preventing Carbide Burr Loading
Mastering Cutting Efficiency: Preventing Carbide Burr Loading Carbide burr loading slows your work and wears down your tools faster than you realize. When debris clogs your burrs, cutting efficiency drops and your project quality suffers. [...]
The Essential Toolkit for Perfect Weld Finish Quality
The Essential Toolkit for Perfect Weld Finish Quality Most welders underestimate how much the right weld cleanup tools impact their final result. Skipping proper cleanup can leave your metalwork rough and weak, costing you time [...]
How to Choose the Best Rotary Tool for Your Fabrication Shop
How to Choose the Best Rotary Tool for Your Fabrication Shop Most fabrication shops waste hours on rotary tools that slow work down and wear out fast. You don’t need another tool that promises everything [...]
Double Cut or Single Cut for Your Next Project?
The Ultimate Carbide Burrs Guide: Double Cut or Single Cut for Your Next Project? Picking the right carbide burrs can make or break your project’s finish. You’ve likely faced the choice between double cut burrs [...]
Finding the Perfect Burr for Clean Results
Carving and Finishing Aluminum: Finding the Perfect Burr for Clean Results You’ve struggled with burrs that clog and leave rough edges on aluminum. Getting clean cuts on this soft metal isn’t about just any tool—it’s [...]
Mastering the Art of Removing Broken Bolts with Carbide Burrs
Mastering the Art of Removing Broken Bolts with Carbide Burrs Broken bolts can bring your mechanical repair to a grinding halt, wasting hours and testing your patience. If you’ve struggled with stuck or snapped fasteners, [...]
Extending the Life of Your Carbide Burrs
Cutting Tool Durability: Extending the Life of Your Carbide Burrs Carbide burrs wear out faster than you might expect when the wrong factors come into play. If you don’t understand the key elements affecting carbide [...]
Carbide Burrs That Excel with Cast Iron
From Shaping to Finishing: Carbide Burrs That Excel with Cast Iron Machining cast iron can wear down your tools faster than you expect and create tough-to-handle dust. Finding the best carbide burr for cast iron [...]
How to Choose the Perfect Carbide Burr for Your Projects
Welding Made Easy: How to Choose the Perfect Carbide Burr for Your Projects Most welders waste time switching between dull or wrong tools without realizing it. Choosing the right carbide burr can cut hours off [...]
Metal Polishing Techniques for Flawless Steel Edges
From Sharp to Smooth: Metal Polishing Techniques for Flawless Steel Edges Sharp, jagged edges from plasma cutting can turn a solid project into a safety risk. Tackling those rough spots isn’t just about looks—it’s about [...]