Step-by-Step – How To Master Engine Porting Using Die Grinder Tool Bits
Grinder enthusiasts, get ready to transform your engine performance! In this guide, you will learn the art of engine porting specifically using die grinder tool bits. Engine porting is a process that enhances airflow, improves efficiency, and boosts horsepower. By following these step-by-step instructions, you can achieve professional-level results in your garage. Whether you are a beginner or looking to refine your skills, this post will provide you with the crucial techniques and tips to elevate your engine modifications effectively.
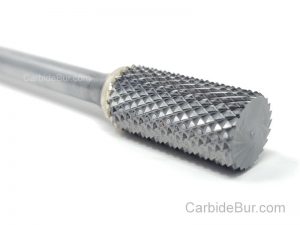
Find more carbide bur die grinder tool bits here
Choosing the Right Die Grinder Tool Bits for Engine Porting
Types of Tool Bits and Their Functions
Selecting the appropriate tool bits is fundamental in your engine porting journey. Each type of die grinder bit serves a specific function in shaping and refining internal surfaces of the engine. Below is a breakdown of common tool bit types and their uses:
| Tool Bit Type | Function |
|---|---|
| Carbide Burrs | Ideal for heavy material removal and shaping. |
| Flap Discs | Best for smoothing and finishing surfaces after shaping. |
| Diamond Bits | Effective for hard materials, offering precision grinding. |
| Steel Wheels | Used for polishing and creating a smooth finish. |
| Mounted Points | Good for hard-to-reach areas and detailed work. |
- This variety enhances your ability to achieve the desired results for your engine’s performance enhancements.
Material Compatibility: Selecting Bits for Different Engine Types
Different engine materials require specific approaches when selecting die grinder bits. Aluminum engine components, for example, are softer and can be more easily shaped with carbide bits or flap discs. However, when working with cast iron or harder materials, diamond bits or tungsten carbide options provide the durability you need for effective porting. A thorough understanding of the material properties and characteristics will help ensure suitable results for performance enhancements.
| Engine Material Type | Recommended Tool Bits |
|---|---|
| Aluminum | Carbide Burrs, Flap Discs |
| Cast Iron | Diamond Bits, Carbide Burrs |
| Stainless Steel | Tungsten Carbide Bits |
| Plastic (composite) | Felt Wheels, Flap Discs |
| Magnesium | Carbide Burrs, Mounted Points |
- After identifying the engine material, you can select bits optimized for performance and durability.
Understanding material compatibility allows you to refine your porting skillset effectively. Both the type of engine material and the application define the choice of tool bits. You will encounter various engine types in your porting experience, making familiarity with their distinct characteristics critical. The right bits enable you to handle everything from high-performance aluminum racing engines to standard domestic cast iron setups with ease.
| Engine Type | Considerations for Tool Selection |
|---|---|
| High-Performance Racing Engines | Need precision and less chatter; opt for fine-grit diamond bits. |
| Standard Production Engines | Focus on carbide burrs for efficiency in shaping. |
| Vintage Engines | Care must be taken; using softer bits can prevent damaging historic materials. |
| Customization Projects | More varied; select bits based on the specific design needs. |
| Hybrid Engines | Consider the dominant material; mixed-use bits may be effective. |
- After you’ve assessed your engine type, tailor your selection further based on the desired outcome and performance improvements.
Essential Safety Precautions for Engine Porting
Engine porting can be an exciting venture that significantly enhances your engine’s capabilities, but it comes with its own set of risks. Safety precautions cannot be overlooked, as the combination of power tools and engine components creates a potentially hazardous environment. Ensuring your workspace is free from distractions and clutter will enhance your focus and efficiency while handling delicate tasks. Before you even pick up your die grinder, perform a quick inspection of your setup to spot any potential hazards. A clean, well-lit, and organized area can drastically reduce the chances of accidents. Additionally, make sure to have a fire extinguisher within reach, as metal shavings and sparks can create unexpected fires if not monitored closely.
Find more carbide bur die grinder tool bits here
Personal Protective Equipment (PPE) Checklist
Your safety is paramount when undertaking any engine porting job. Equip yourself with the right personal protective equipment (PPE) to shield against debris, noise, and dust. A high-quality pair of safety goggles protects your eyes from flying metal shavings, while a durable dust mask filters out harmful particles. Hearing protection is also a must; over prolonged periods, the noise from the die grinder can exceed safe decibel levels, leading to potential hearing loss. Non-slip gloves will not only improve your grip but also safeguard your hands from sharp edges and accidental slips.
Don’t overlook proper attire in your safety preparations. Wear long sleeves and sturdy clothing to minimize skin exposure, as well as closed-toe shoes to guard your feet. Consider using a dust collection system or a vacuum to keep your work area clean and reduce inhalation of harmful particles. This simple yet effective approach significantly enhances safety while fostering a more enjoyable work environment.
Safe Practices to Prevent Injury and Damage
Employing safe work practices is just as vital as wearing the right protective gear. Always adhere to the manufacturer’s instructions for your die grinder and tool bits, ensuring you are utilizing them within their rated specifications. Before starting up your grinder, confirm that the bits are tightly secured and inspect them for any damage. Running a damaged tool can lead to erratic movements or breakage, which increases the risk of injury. Additionally, maintain a firm grip on the grinder to have better control and reduce the risk of accidents.
Establish a systematic workflow prior to venturing into porting. Plan each step and avoid rushing through tasks, which can lead to mistakes. If you encounter resistance while grinding, stop and inspect the work rather than forcing the tool. This helps maintain not only your safety but also the integrity of the engine part you are modifying. Having a supportive partner nearby can also enhance safety; they can assist with holding parts or providing an extra set of eyes to catch any issues before they escalate. Always prioritize quality over speed in your engine porting endeavors—taking your time will yield better results and maintain safety.
Preparing Your Engine for Porting
Disassembly: Step-by-Step Guide
| Step | Description |
|---|---|
| 1 | Remove the engine from the vehicle, ensuring you’ve disconnected all necessary wiring and hoses. |
| 2 | Drain all fluids, including oil and coolant, to prevent messes during disassembly. |
| 3 | Carefully remove external components, such as the intake and exhaust manifolds, following the correct order to avoid damaging parts. |
| 4 | Detach the cylinder head, ensuring to keep track of all bolts and components to facilitate reassembly. |
| 5 | Inspect the gaskets and seals as you disassemble, replacing any that are damaged before reassembly. |
Each component you remove should be set aside carefully, maintaining organization to streamline the reassembly process. Take your time with this step; a rushed disassembly might lead to misplaced parts or misremembered sequences. Utilize your smartphone to capture photos at various stages; these can be invaluable when it comes time to put everything back together.
Cleaning and Inspection: Setting the Stage for Porting
Once disassembled, the next step involves thoroughly cleaning all parts to eliminate grease, dirt, and any leftover gasket material. This process isn’t just about appearances; contaminants on the surfaces can affect how well your porting modifications perform, impairing airflow and overall efficiency. A combination of solvent, brushes, and compressed air works wonders in restoring the components to a clean state.
After cleaning, inspect each part carefully. Look for signs of wear or damage, particularly in the cylinder head and intake manifold. Any imperfections should be documented, and a decision made whether they require attention or replacement. Significant issues, such as cracks or excessive warping, may influence the effectiveness of your porting work and should be rectified before any modifications are attempted.
Mastering Engine Porting Techniques with Precision
When you investigate the intricacies of engine porting, honing your techniques for both intake and exhaust ports is paramount. For intake porting, focus on removing material to create a smooth, unobstructed path for the airflow entering the combustion chamber. Evaluate the shape and size of the ports, noting that a funnel-like profile can improve flow dynamics significantly. Use your die grinder with a variety of bit shapes, such as carbide burrs or diamond-coated bits, shifting your grip and angle to refine the interior contours. The goal is to create a pathway that enhances volumetric efficiency while preserving swirl and tumble within the chamber.
Techniques for Intake and Exhaust Porting
For exhaust porting, the focus is on reducing turbulence and optimizing the flow of exhaust gases leaving the engine. You’ll need to widen the ports slightly and blend them into the exhaust manifold. Pay careful attention to the transition points, as any abrupt changes can lead to flow problems. The key lies in creating a design that minimizes back pressure, which in turn can increase overall engine performance. As you refine these ports, always make sure to keep a consistent wall thickness to prevent any weak points in the structure of the head.
Achieving Optimal Flow: Tips for Shaping and Smoothing
Smoothing the port surfaces is integral to achieving optimal airflow. After shaping, the use of sanding rolls or flap discs can help to fine-tune any imperfections and ensure a sleek finish. Achieving the right surface texture reduces friction and promotes efficient gas flow. Employ a progressive technique: begin with coarser bits to remove material quickly, then gradually work your way to finer grits for the smoothest possible finish. Don’t rush this stage, as a rough surface can lead to turbulence, ultimately compromising performance.
- Utilize various grit sizes for incremental smoothing
- Employ a meticulous eye for transitions and angles
- Prioritize patience and thoroughness to achieve a professional finish
The finish on your ports can mean the difference between a good port job and a great one. As you refine the inner surfaces, consider using a technique called “flow testing” to assess the effectiveness of your work. This could involve a basic airflow bench or even using a smoke test to visualize the gas flow. Adjustments may be necessary based on the initial results, and ongoing assessment will lead to improvements in your technique.
- Utilize flow testing for visualizing gas dynamics
- Be open to making adjustments based on real-time data
- Focus on learning from each session, fine-tuning your approach
Thou shall notice that continuously honing your skills through practice and evaluation allows you to unlock the full potential of your engine. This dedication not only sets you apart as a skilled porting enthusiast but also translates directly into enhanced vehicle performance.
Common Pitfalls and Troubleshooting Your Porting Job
Identifying and Correcting Mistakes
Throughout the porting process, mistakes can happen, leading to unwanted airflow turbulence or reduced performance. One common error is removing too much material from a port, which can result in sharp edges or an uneven surface that disrupts airflow. During your inspection, look for inconsistent wall thickness or jagged edges. Utilizing a caliper or a flowbench can help you assess port geometry more accurately, and when modifications lead to undesirable changes, having an experienced pair of eyes on the work can help identify specific issues you might not notice on your own. Another key area to check is the alignment of your work. Port mismatches at the junctions between the intake manifold and cylinder heads can lead to turbulence. You can confirm alignment by using layout dye or even a simple flashlight to check for light leaks. In cases where misalignment is evident, precision is paramount; you may need to go back and make slight adjustments or refinements to ensure a smoother transition is achieved.
What to Do if Results Don’t Meet Expectations
After completing your porting project, you might find that the engine doesn’t perform as anticipated. Several factors could contribute to this situation. First, revisit your tuning parameters, as changes in airflow dynamics often necessitate adjustments in fuel delivery and ignition timing. If you’ve made significant alterations to the engine’s breathing, it could lead to a richer or leaner condition, impacting overall performance. Your dynamometer data will be invaluable in this analysis, allowing you to cross-reference before-and-after figures to identify discrepancies. If you’ve followed the process meticulously yet still encounter issues, consider conducting more comprehensive tests to evaluate the airflow through each port. A skilled professional can help diagnose if there’s an underlying problem related to the cylinder head material or the design itself, determining whether the problem stems from the porting process or an unrelated engine component. In some instances, lackluster results can stem from inadequate testing or assessment of your work. Going back to your numbers and refining the flow characteristics may unveil areas that still require attention or adjustments. Don’t hesitate to reach out to the community or forums available for performance enthusiasts, as shared experiences often highlight solutions that are not immediately obvious.
Conclusion
To wrap up, mastering engine porting using die grinder tool bits is an invaluable skill that can greatly enhance your engine’s performance. By following the structured steps outlined in this guide, you can develop the precision and technique needed to achieve optimal airflow and efficiency. Your choice of tools, materials, and techniques plays a significant role in the final outcome, so take the time to familiarize yourself with each element of the process. This hands-on approach will not only improve your technical abilities but also deepen your understanding of engine mechanics.
As you launch on this journey, keep in mind that practice and patience are your allies. Each porting project will bring new challenges and learning experiences, so don’t hesitate to revisit the fundamentals or seek additional resources if needed. With dedication and careful attention to detail, you will find yourself becoming more adept at engine porting, leading to successful modifications that can elevate your vehicle’s performance. Embrace the process, and soon enough, you’ll confidently stamp your mark on your engine’s design.
Find more carbide bur die grinder tool bits here
Perfecting Aluminum Porting for Improved Airflow
Engine Enthusiasts' Guide to Burr Shapes: Perfecting Aluminum Porting for Improved Airflow Most people think any burr shape works for aluminum porting. That’s why so many end up battling sticky residue and uneven airflow. Choosing [...]
The Ultimate Guide to Using Die Grinders in Metal Fabrication
The Ultimate Guide to Using Die Grinders in Metal Fabrication Most metal fabricators struggle with using die grinders without wasting time or damaging their work. You might own the right tools but still miss key [...]
Effective Weld Grinding Techniques for Stainless Steel
Empower Your Craft: Effective Weld Grinding Techniques for Stainless Steel Grinding stainless steel welds can feel like a never-ending battle against scratches and uneven surfaces. You’ve spent hours welding, only to find the finish doesn’t [...]
Expert Tips on Grinding and Sanding Welds
Enhance Your Welding Skills: Expert Tips on Grinding and Sanding Welds Most welds look rough right after the job, leaving your project far from professional. You know that smoothing welds is key to clean, strong [...]
Surface Preparation With Carbide Burrs
DIY Rust Removal Made Easy: Surface Preparation With Carbide Burrs Rust stuck on your metal projects can ruin hours of work and leave surfaces uneven. You want a way to clean it off without wasting [...]
Preventing Carbide Burr Loading
Mastering Cutting Efficiency: Preventing Carbide Burr Loading Carbide burr loading slows your work and wears down your tools faster than you realize. When debris clogs your burrs, cutting efficiency drops and your project quality suffers. [...]
The Essential Toolkit for Perfect Weld Finish Quality
The Essential Toolkit for Perfect Weld Finish Quality Most welders underestimate how much the right weld cleanup tools impact their final result. Skipping proper cleanup can leave your metalwork rough and weak, costing you time [...]
How to Choose the Best Rotary Tool for Your Fabrication Shop
How to Choose the Best Rotary Tool for Your Fabrication Shop Most fabrication shops waste hours on rotary tools that slow work down and wear out fast. You don’t need another tool that promises everything [...]
Double Cut or Single Cut for Your Next Project?
The Ultimate Carbide Burrs Guide: Double Cut or Single Cut for Your Next Project? Picking the right carbide burrs can make or break your project’s finish. You’ve likely faced the choice between double cut burrs [...]
Finding the Perfect Burr for Clean Results
Carving and Finishing Aluminum: Finding the Perfect Burr for Clean Results You’ve struggled with burrs that clog and leave rough edges on aluminum. Getting clean cuts on this soft metal isn’t about just any tool—it’s [...]
Mastering the Art of Removing Broken Bolts with Carbide Burrs
Mastering the Art of Removing Broken Bolts with Carbide Burrs Broken bolts can bring your mechanical repair to a grinding halt, wasting hours and testing your patience. If you’ve struggled with stuck or snapped fasteners, [...]
Extending the Life of Your Carbide Burrs
Cutting Tool Durability: Extending the Life of Your Carbide Burrs Carbide burrs wear out faster than you might expect when the wrong factors come into play. If you don’t understand the key elements affecting carbide [...]